Introduction
Are you ready to dive into the world of canning for beginners? In this guide, we will explore the basics of canning 101, the art of preservation that allows you to enjoy your favorite fruits and vegetables all year long. Whether you're a seasoned cook or new to the kitchen, canning is a rewarding skill that can help you stock your pantry with healthy, homemade goodies. Let's get started on this journey of preserving flavors and memories!
Gathering Your Canning Essentials
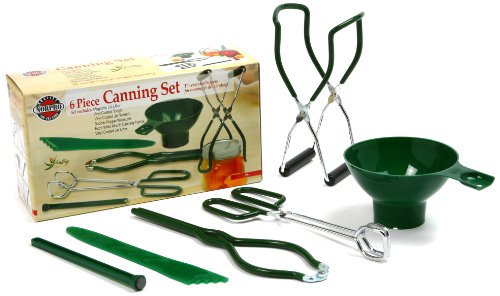
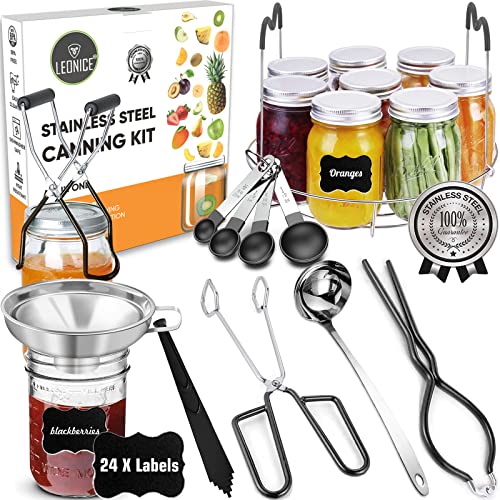
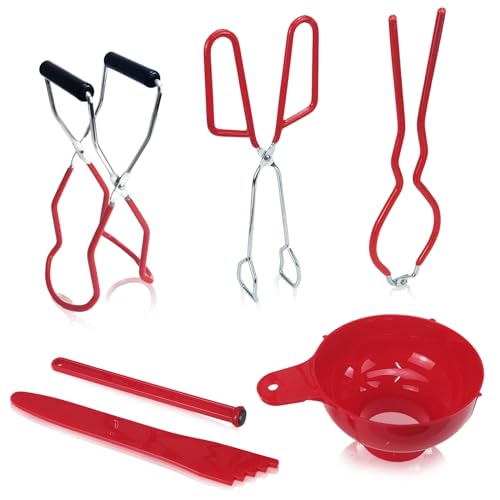
Embarking on your canning journey starts with a heartfelt step: assembling your canning essentials with care. Imagine your kitchen as a canvas for creating lasting memories, where every tool and ingredient plays a vital role in the art of preservation. The foundation of this craft begins with securing the right canning supplies. A sturdy canning kit is your trusty companion, equipped with essentials such as a jar lifter, funnel, and magnetic lid lifter, ensuring your canning experience is both safe and enjoyable.
4.27 out of 5 stars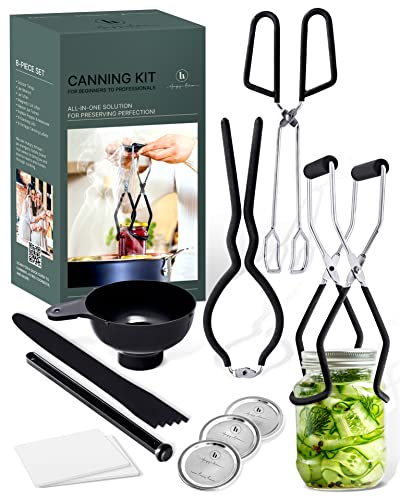
8-Piece Canning Kit for Beginners
Everything you need to get started canning delicious recipes at home
Product information
Product Review Score
Product links
Canning jars and lids are like the vessels of your love and labor, waiting to be filled with the flavors of the season. Whether you opt for traditional mason jars or something more specialized, ensure they are free from cracks and nicks to guarantee a perfect seal. Depending on your plans, you might find yourself drawn to a water bath canner, ideal for those delightful jams, jellies, and pickles, or a pressure canner, necessary for preserving the bounty of vegetables and meats safely.
$30.99
4.99 out of 5 stars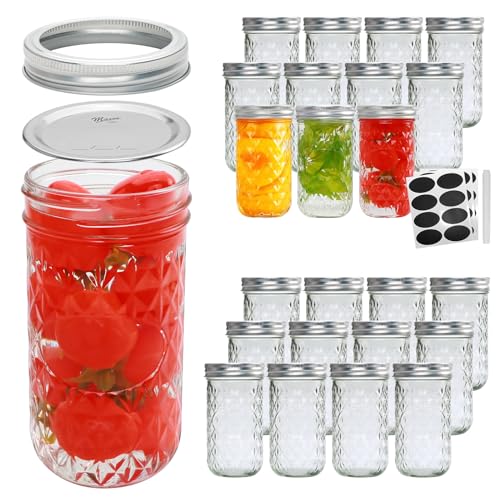
12oz Mason Jars with Airtight Lids, 24 Pack
Perfect storage solution for preserving your favorite foods with these 12oz Mason Jars with Airtight Lids, 24 Pack
Product information
Product Review Score
Product links
Remember, quality in your canning adventure means not just following recipes to the letter but starting with the very best tools you can find. Each piece of your canning kit plays a role in weaving the fabric of your family's food story, ensuring safety, and capturing the essence of your homegrown or locally sourced produce. As you gather these essentials, you're not just preparing for a culinary endeavor; you're setting the stage for wholesome, healthy canning that fills your pantry and your heart with joy.
Preparing Your Ingredients with Love and Care
The foundation of any heartfelt canning endeavor lies in the preparation of your ingredients with the utmost love and care. This pivotal step is where the magic begins, transforming the simple act of canning into a labor of love that captures the essence of each season. Begin by selecting the freshest produce, picked at the peak of ripeness, to ensure your canned goods are imbued with the best flavor and nutritional value.

Gently wash your fruits and vegetables under cool running water, carefully removing any dirt or debris that might be clinging to them. For those ingredients requiring peeling or chopping, do so with precision and thoughtfulness, considering how each piece will fit within the confines of your jars. It's not just about the aesthetics; it's about ensuring even cooking and preservation.
If you're working with fruits that brown quickly, such as apples or pears, consider tossing them in a solution of water and lemon juice to preserve their color and freshness. It's these small acts of care that make all the difference in canning.
As you prepare your ingredients, take a moment to appreciate the bounty before you. Reflect on the hands that planted and tended to these fruits and vegetables, whether they were your own or those of a local farmer. Canning is not just about preserving food; it's about preserving a moment in time, a connection to the land, and the heartfelt effort that goes into each jar.
By approaching this process with patience, respect, and a genuine love for what you're doing, you'll ensure that each jar of preserved goods is not only safe and healthy but also a true reflection of your dedication to quality and care.
Sterilizing Jars and Lids, the First Step to Safety
Embarking on the beautiful journey of canning, where each jar is a testament to love, dedication, and the joy of preserving, begins with a critical yet simple act of ensuring safety – sterilizing your jars and lids. This step is the guardian of your canning process, a gentle reminder of the care and attention we must give to not only what we create but how we prepare for its creation.
Imagine each jar as a future home for your carefully prepared ingredients, each lid a seal of promise for preservation. Sterilizing is akin to preparing a cozy, safe environment for these precious contents. The process involves immersing your jars and lids in boiling water for a few minutes, a bath that purifies and prepares them for the task ahead. You can also utilize the sterilize setting on your dishwasher, an alternative that marries convenience with effectiveness.
As you handle the hot jars and lids, perhaps with a jar lifter from your canning kit, let this be a moment of mindfulness and respect for the process. It’s a dance with heat and water, a balance of ensuring every nook and cranny is ready to play its role in preserving the bounty of your kitchen endeavors.
Remember, this step, while simple, is imbued with significance. It's the first embrace of safety for the delicious, healthy canning creations that will soon emerge from your kitchen. By starting here, you're not only safeguarding your food but also nurturing the trust in every jar you’ll lovingly place on your pantry shelf. For more safety tips, please see our article on Safe Canning
Filling the Jars: A Balance of Beauty and Science
Filling your jars is where the heart of canning melds with the precision of science, a delicate dance that ensures the safety and quality of your preserved treasures. This moment, dear canner, is more than just transferring your lovingly prepared ingredients into sterilized jars; it's about understanding the importance of headspace and the role it plays in the preservation process.
Headspace, the gap between the food and the jar's lid, is crucial for allowing the contents to expand during heating and for forming a vacuum seal upon cooling. This space is not arbitrary; it is carefully measured, often requiring a quarter-inch for jams and jellies and a half-inch for fruits and vegetables. Employ a ruler or a specialized tool from your canning kit to ensure accuracy, for this precision speaks to the balance between beauty and the science behind safe canning.
As you fill each jar, use a canning funnel to guide your precious ingredients, ensuring a clean and efficient transfer. This not only keeps the jar rims clean, facilitating a proper seal, but also honors the beauty of each ingredient's shape and color, showcasing the artistry in your work.
After filling, take a moment to gently remove any air bubbles with a non-metallic spatula, circling the inner perimeter of the jar. This act, while simple, is a testament to your dedication to creating a safe, aesthetic preserve.
Finally, with a clean cloth, meticulously wipe the rims of the jars, removing any residue that could impede sealing. This step is a blend of care and science, ensuring that when you place the lids on your jars, you're sealing in not just the flavors and nutrition of your ingredients, but your commitment to the art and science of canning.
The Processing of Jars, Sealing in Goodness
$64.99
4.31 out of 5 stars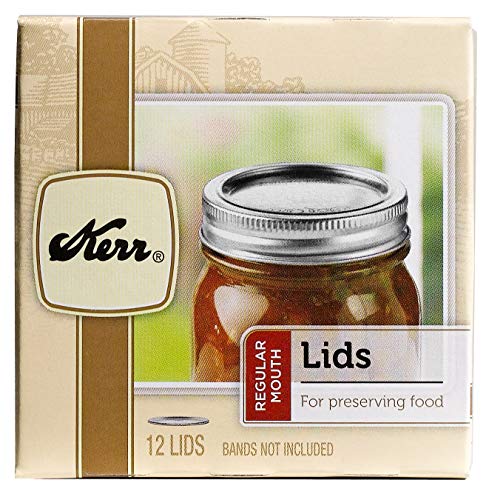
Kerr Can Jar Lids 10 pack (12/pack) by Jarden
Regular Mouth Metal Canning Jar Lids by Kerr - Pack of 10 (12/pack)
Product information
Product Review Score
Product links
Once your jars are tenderly filled, with each one holding the promise of future enjoyment, the next step is to seal in the goodness through the process of processing. This essential phase in your canning journey ensures that all the love and care you’ve put into preparing your jars results in safe, delicious preserves that honor the efforts behind them. The method you choose – be it water bath canning for your vibrant jams and tangy pickles, or pressure canning for hearty soups and nutritious vegetables – plays a pivotal role in safeguarding the integrity of your preserves.
In this critical stage, we venture beyond simply filling jars with delectable creations; we commit to ensuring their longevity and safety. By adhering to the recommended processing times and methods tailored to the nature of your food, you engage in a practice that has been honed over generations. It's a testament to the importance of preserving not just the food itself, but the tradition and craft of canning.
Water bath canning envelops your jars in a gentle, yet effective, boil, ensuring that high-acid foods are preserved in their peak state. Pressure canning, on the other hand, embraces your low-acid ingredients with the warmth and pressure needed to guarantee their safety. Each jar that undergoes this process is a step closer to achieving a seal that locks in flavor, nutrition, and the very essence of the season.
As you diligently process each jar, envision the moments when these preserved delights will be shared and savored. This isn't merely about canning food; it's about crafting a legacy of nourishment and joy that extends well beyond your kitchen.
Mastering Water Bath Canning for Acidic Foods
Mastering the art of water bath canning for your treasured acidic foods such as jams, jellies, and tomatoes, unfolds a chapter of canning that is both enchanting and fundamental. The water bath method is a gentle embrace, cocooning your jars in a simmering cauldron, ensuring that every morsel of your hard work is preserved in its most vibrant state. Begin by cradling your filled jars into the caressing waters of a large pot, ensuring they are adorned with enough water to surpass their crowns by at least an inch, a testament to ensuring their safe passage through the canning process. As the water whispers to a boil, let the jars bathe for the time recommended, a period where patience melds with anticipation.
Upon the completion of their journey, the act of carefully lifting the jars from their watery nest is one of reverence. Setting them upon a towel, away from the hustle of daily life, allows them to cool and settle, a quiet moment in the bustling process of preservation. This stage of water bath canning is not merely about the technicalities; it is a rite of passage for each jar, from being filled with love and care to becoming a stalwart keeper of the season’s bounty. As you master this method, you weave yourself into the fabric of an age-old tradition, ensuring the essence of your garden or farmer’s market finds are captured and savored, long after their season has passed.
Exploring Pressure Canning for Low-Acid Foods
Venturing into the realm of pressure canning opens up a world of possibilities for preserving low-acid foods such as vegetables, meats, and soups. This method ensures that these foods are safely canned, as the high temperatures achieved in a pressure canner effectively eliminate the risk of botulism and other harmful bacteria. Begin by carefully placing your filled jars into the pressure canner, ensuring they are not overcrowded. Add the recommended amount of water, secure the lid, and heat the canner until steam flows steadily from the vent. At this point, close the vent and allow the pressure to build to the required level, usually 10-15 pounds per square inch, depending on your altitude and recipe.
The processing time will vary depending on the specific food being canned, so always refer to a trusted guide or recipe. Once the processing time is complete, turn off the heat and allow the canner to cool naturally until the pressure returns to zero. This gradual cooling is crucial for maintaining the integrity of the jars and preventing breakage. When the pressure gauge reads zero, carefully open the canner lid, being mindful of the hot steam. Your jars are now ready to be removed and cooled, holding within them the preserved goodness of your hard work and dedication.
The Cool Down: Handling Your Jars Post-Processing
The cooling phase of the canning process is a crucial step in ensuring the safety and success of your preserved foods. After processing, carefully remove the jars from the canner using a jar lifter, and place them on a towel or cooling rack. This allows air to circulate around the jars, aiding in even cooling and preventing potential thermal shock that could cause the jars to break. Avoid placing the hot jars on a cold surface or in a drafty area, as sudden temperature changes can compromise the jars' integrity.
$9.99
4.94 out of 5 stars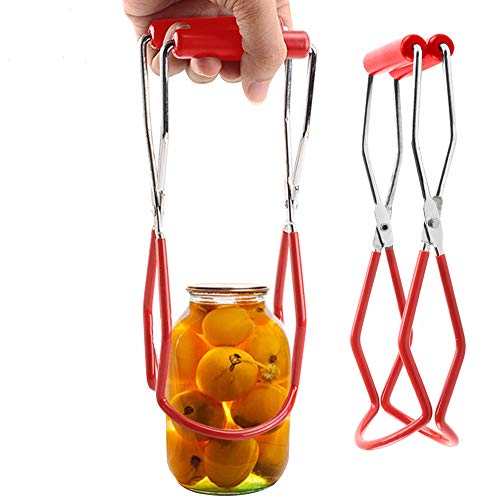
Chef Canning Jar Lifter- Safely remove jars from water
Product Subtitle: Effortlessly remove jars from hot water with our Chef Canning Jar Lifter
Product information
Product Review Score
Product links
Leave the jars undisturbed for 12-24 hours to allow them to cool completely. During this time, the lids will seal as the contents inside create a vacuum. You may hear the satisfying "pop" of the lids sealing, a reassuring sign that your efforts have been successful. Once the jars have cooled, check the seals by pressing down on the center of each lid. If the lid does not flex, the jar is sealed correctly. For any jars that did not seal, refrigerate and use the contents within a few days, or reprocess them using a new lid.
Storing Your Treasures: Tips for a Well-Stocked Pantry
Proper storage of your canned goods is essential to maintain their quality and safety. Once your jars are sealed and cooled, remove the screw bands to prevent them from rusting and to ensure any potential seal failures are visible. Wipe the jars clean with a damp cloth to remove any residue, then label them with the contents and the date of canning. This helps you keep track of your inventory and ensures you use the oldest jars first, maintaining a rotation system for freshness.
Store your jars in a cool, dark place such as a pantry, basement, or cupboard. Ideal storage conditions are between 50-70°F (10-21°C) to prevent spoilage and extend the shelf life of your preserves. Avoid areas with fluctuating temperatures, direct sunlight, or high humidity, as these can affect the quality and safety of your canned goods. With proper storage, your home-canned treasures can last for up to a year or more, allowing you to enjoy the fruits of your labor throughout the seasons.

Enjoying the Fruits of Your Labor: From Jar to Table
The ultimate reward of canning is savoring the delicious, homemade preserves that you’ve created with love and care. Whether it’s spreading a spoonful of homemade jam on your morning toast, adding a dollop of salsa to your tacos, or enjoying a comforting bowl of home-canned soup on a chilly day, each jar represents a labor of love and a connection to the seasons past.
Get creative in the kitchen by incorporating your canned goods into everyday meals and special recipes. Canned fruits can be used in desserts, pies, or as a topping for yogurt and ice cream. Pickles and relishes add a burst of flavor to sandwiches, burgers, and salads. Pressure-canned vegetables and meats can be the base for hearty stews, casseroles, and stir-fries. Share your homemade preserves with friends and family, offering them a taste of your culinary creativity and the bounty of your canning efforts.
Enjoying your home-canned foods is not just about eating; it's about relishing the satisfaction of self-sufficiency, the joy of preserving the best of each season, and the warmth of sharing your creations with loved ones. So, open a jar, savor the flavors, and celebrate the art of preservation that brings the essence of the garden to your table year-round.